
or
cheat SpawnDino "Blueprint'/Game/Aberration/Dinos/Basilisk/Basilisk_Character_BP.Basilisk_Character_BP'" 500 0 0 35


Common
Rare
Untameable
Cave
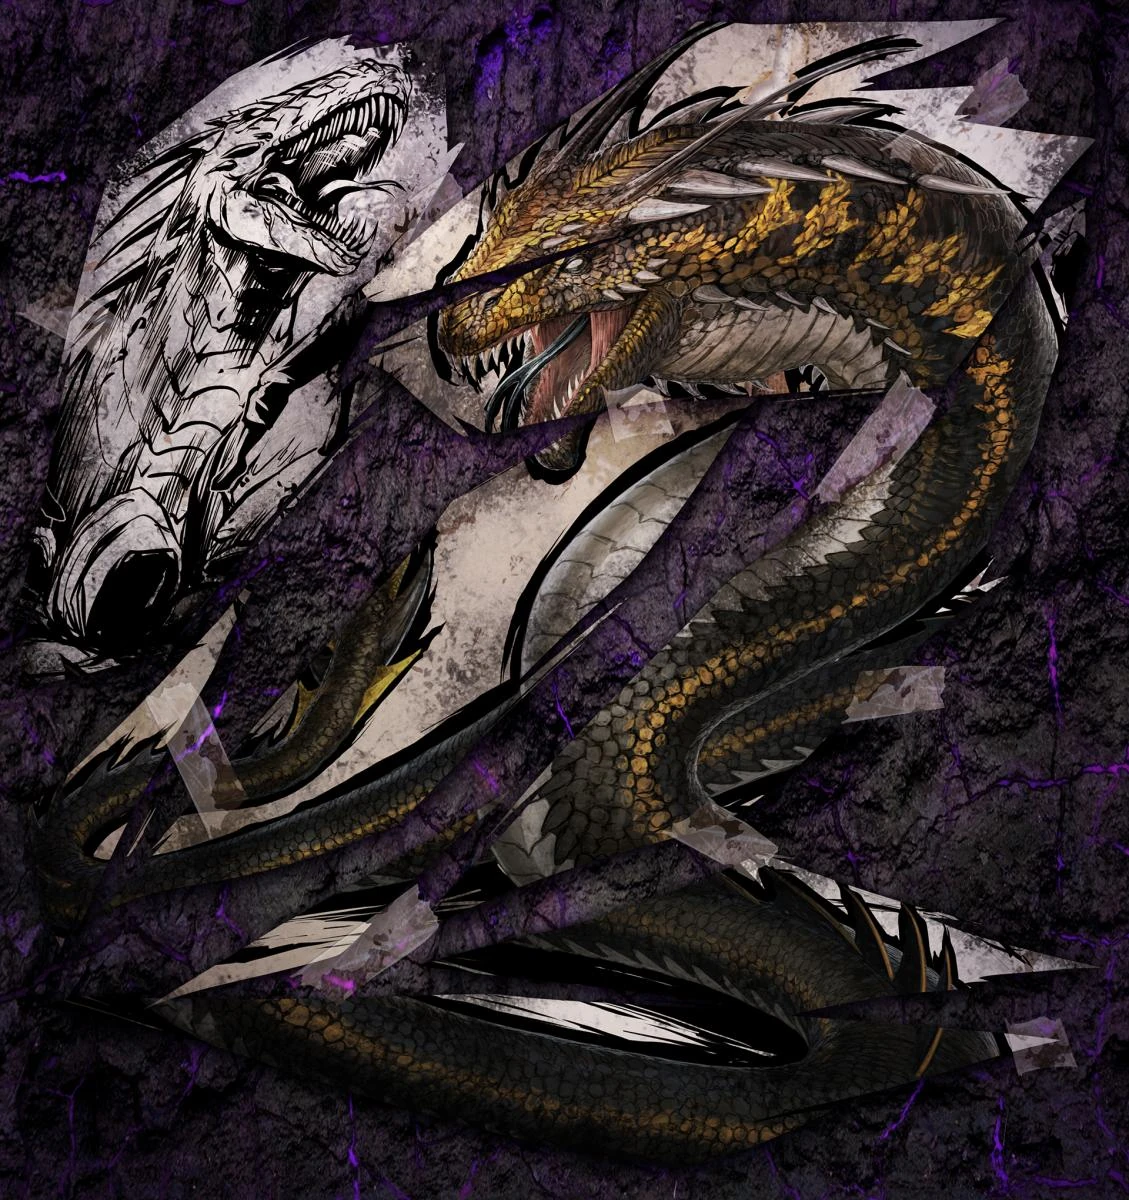
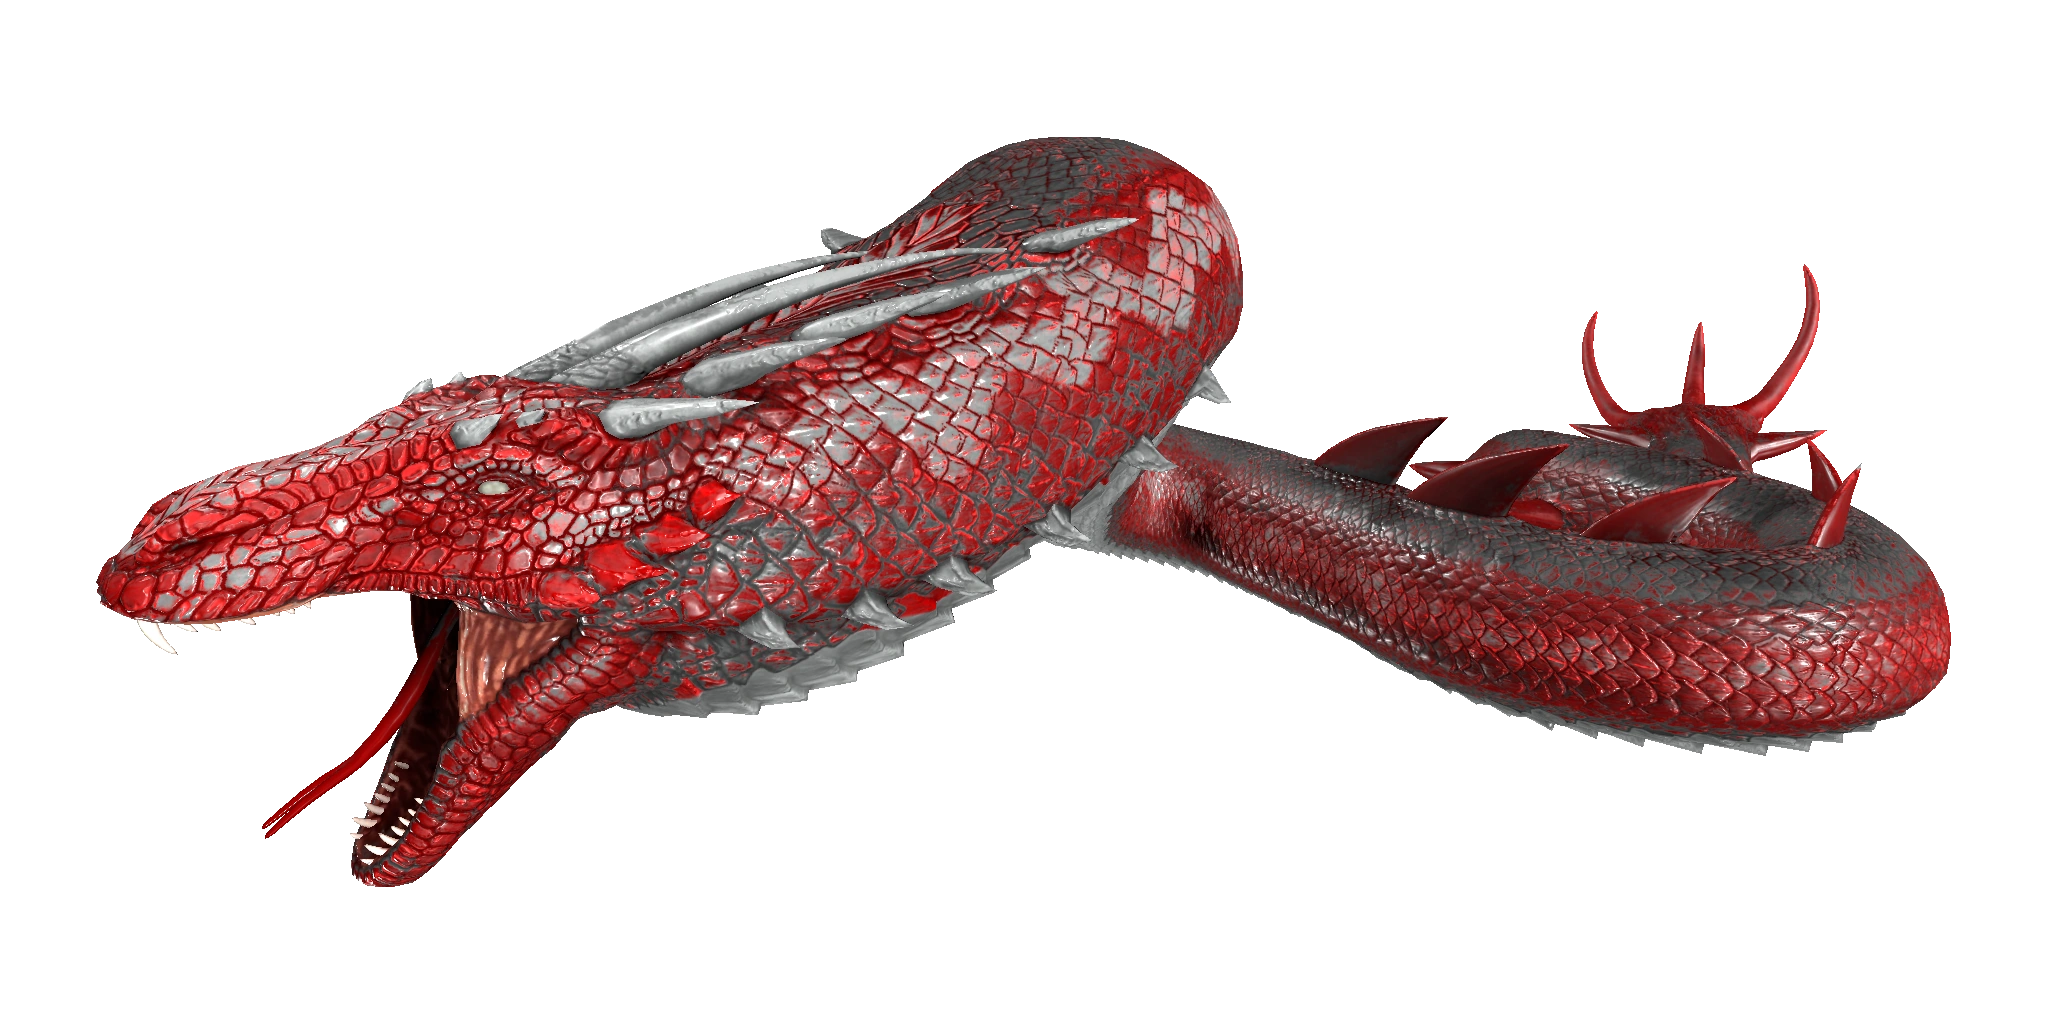
The Basilisk is one of the Creatures in ARK: Survival Evolved's Aberration expansion.
Basic Info
Dossier
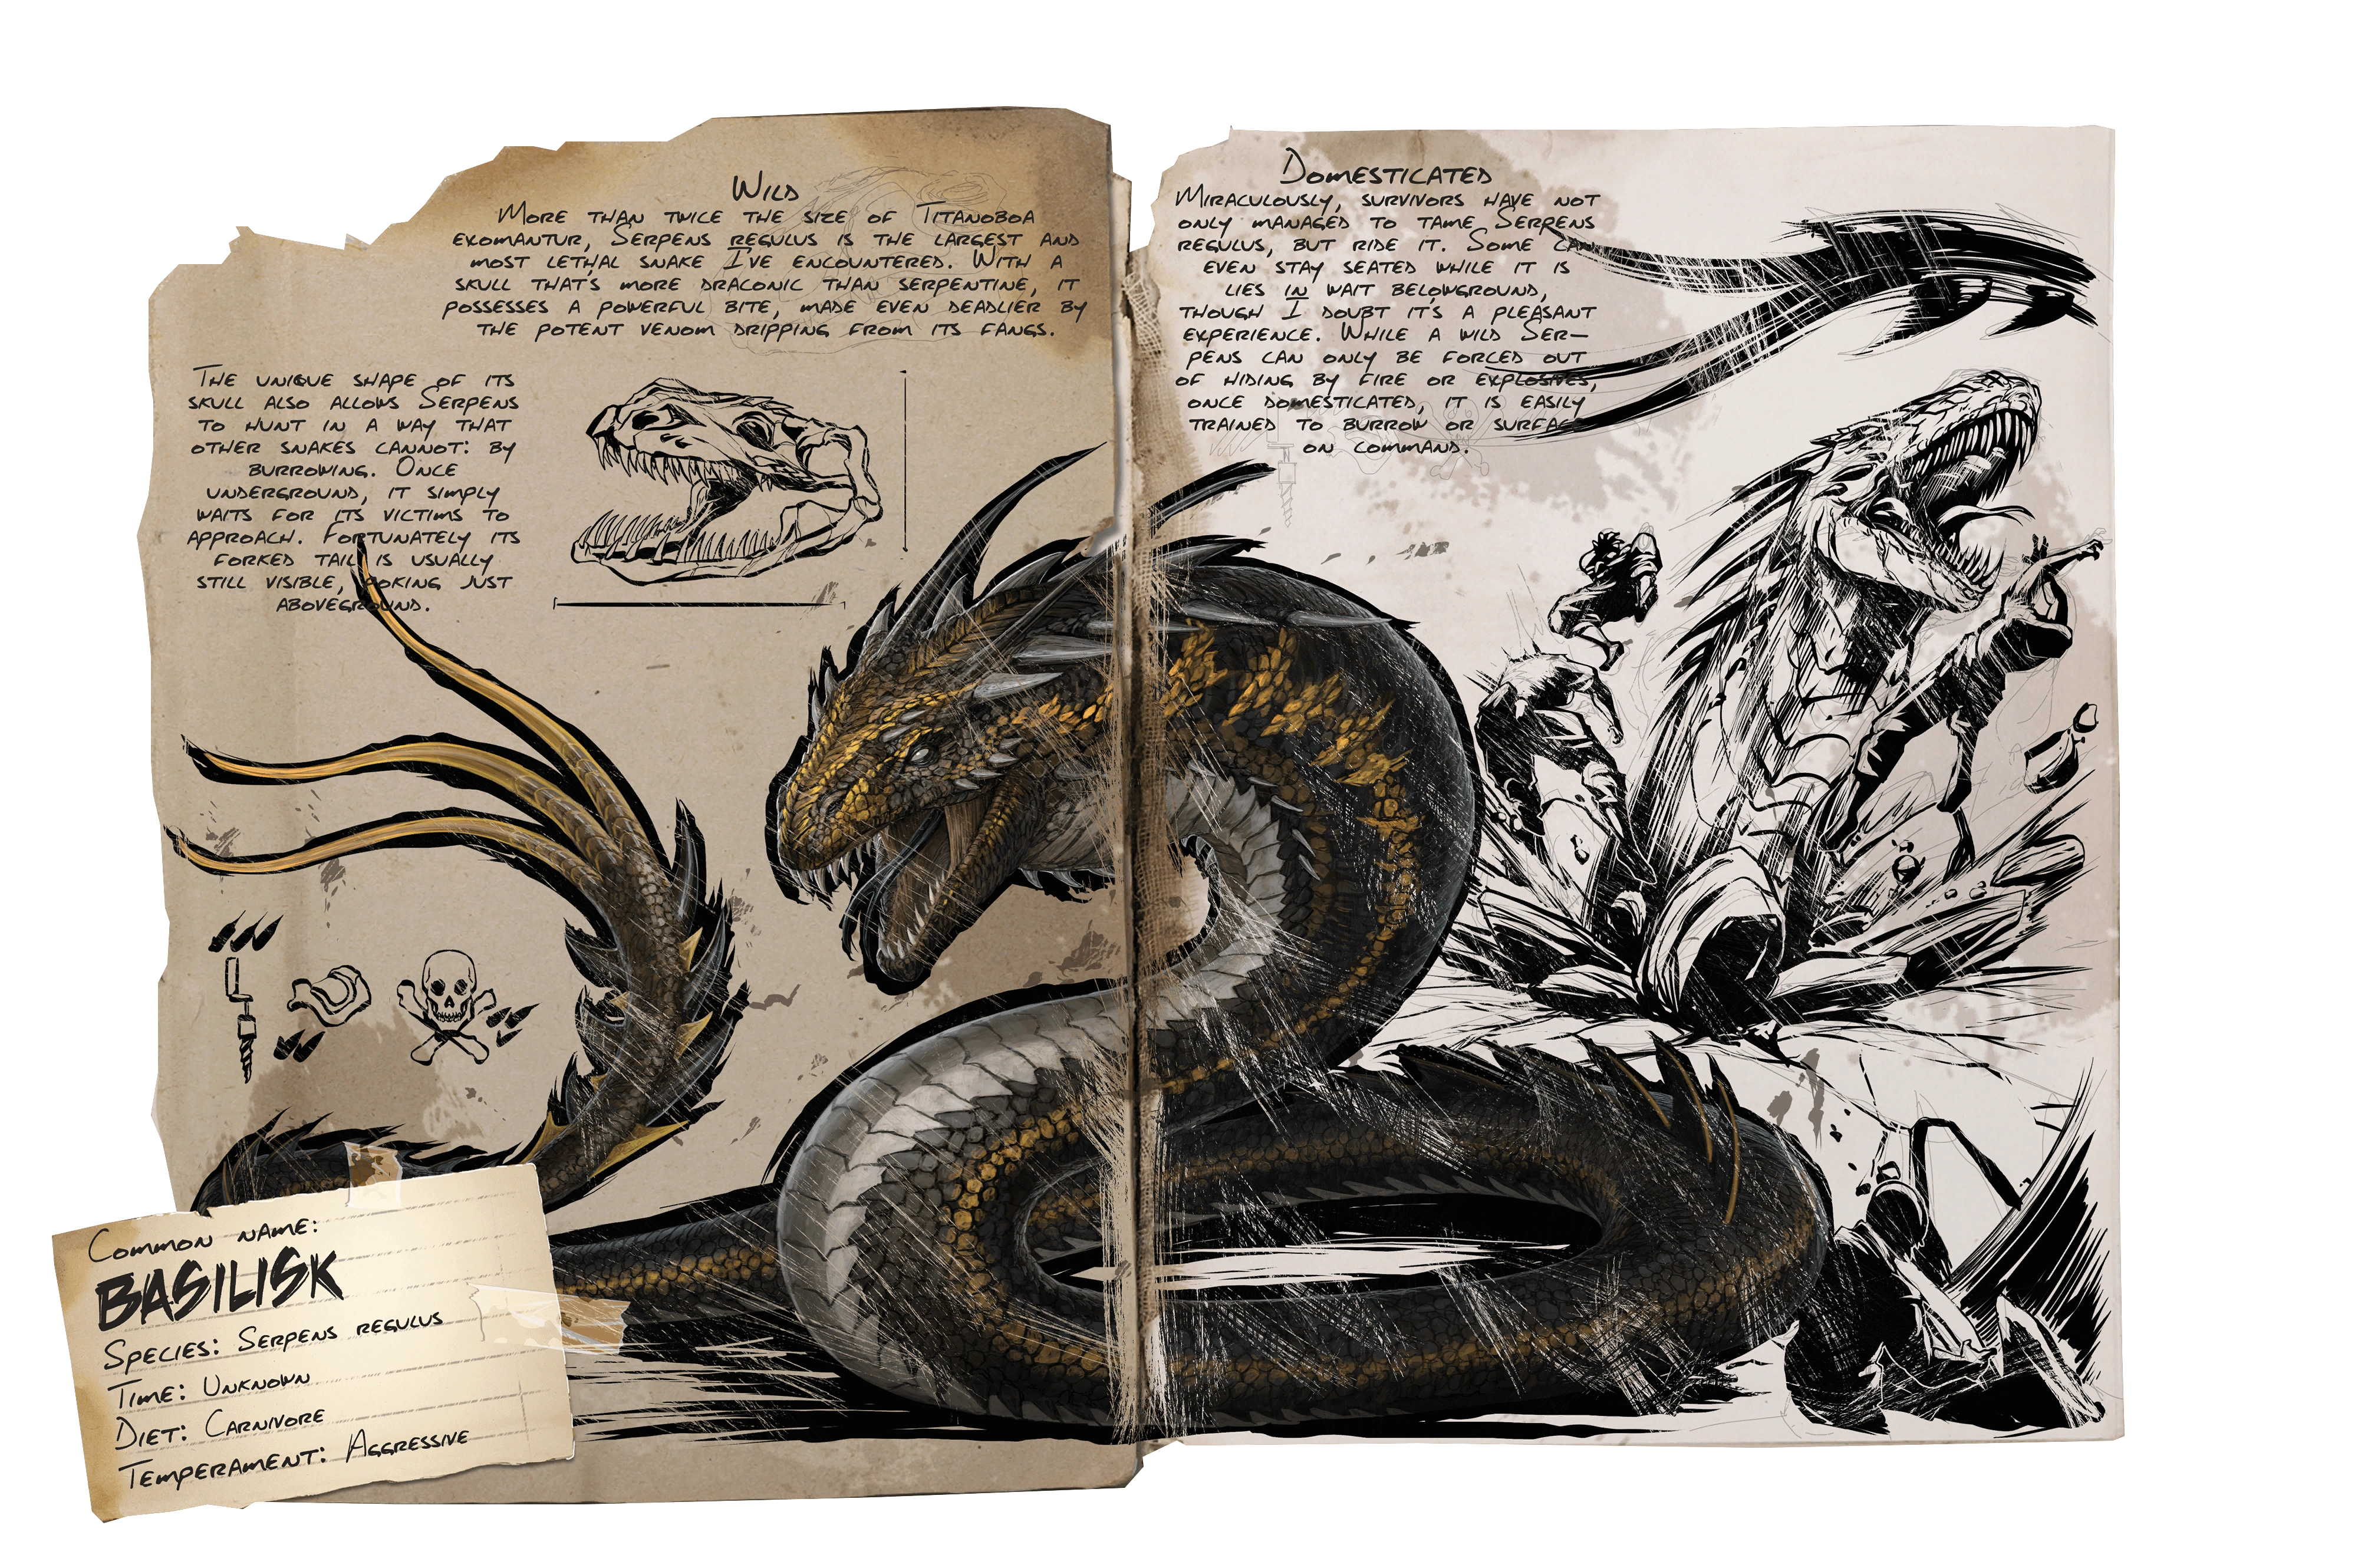
This section is intended to be an exact copy of what the survivor Helena Walker, the author of the dossiers, has written. There may be some discrepancies between this text and the in-game creature.

- Wild
More than twice the size of wild Titanoboa exonantur, Serpens regulus is the largest and most lethal snake I've encountered. With a skull that's more draconic than serpentine, it possesses a powerful bite, made even deadlier by the potent venom dripping from its fangs. The unique shape of its skull allows Serpens to hunt in a way that other snakes cannot: by burrowing. Once underground, it simply waits for its victims to approach. Fortunately its forked tail is usually still visible, poking just aboveground.
- Domesticated
Miraculously, survivors have not only managed to tame Serpens regulus, but ride it. Some can even stay seated while it lies in wait belowground, though I doubt it's a pleasant experience. While a wild Serpens can only be forced out of hiding by fire or explosives, once domesticated, it is easily trained to burrow or surface on command.
Behavior
Waits hidden underground for its prey to approach before it springs out in ambush.
Spawns at an uncommon rate in The Portal and rarely in The Edge areas.
Appearance
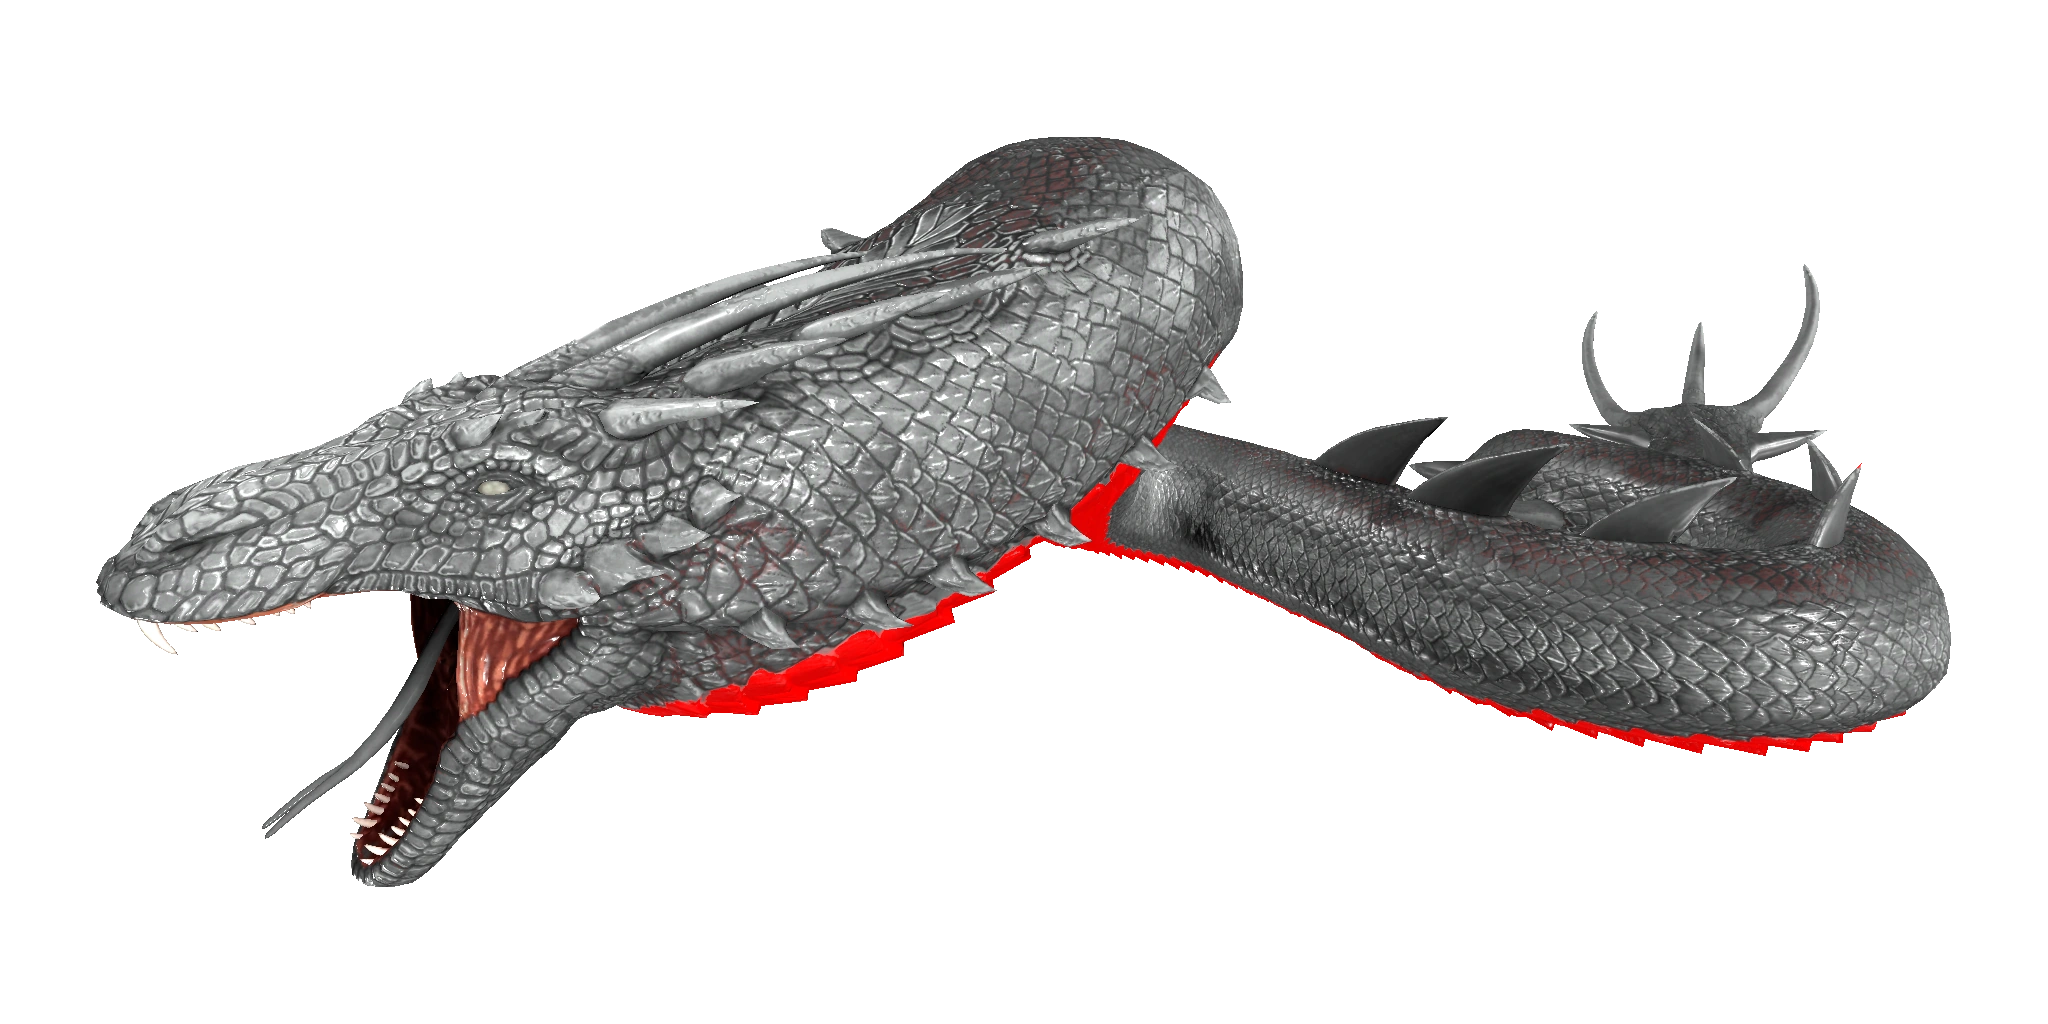
This section displays the Basilisk's natural colors and regions. For demonstration, the regions below are colored red over an albino Basilisk. The colored squares shown underneath each region's description are the colors that the Basilisk will randomly spawn with to provide an overall range of its natural color scheme. Hover your cursor over a color to display its name and ID.
This information can be used to alter the Basilisk's regions by entering cheat SetTargetDinoColor <ColorRegion> <ColorID> in the cheat console. For instance, cheat SetTargetDinoColor 0 6 would color the Basilisk's "body main" magenta.
Body Main
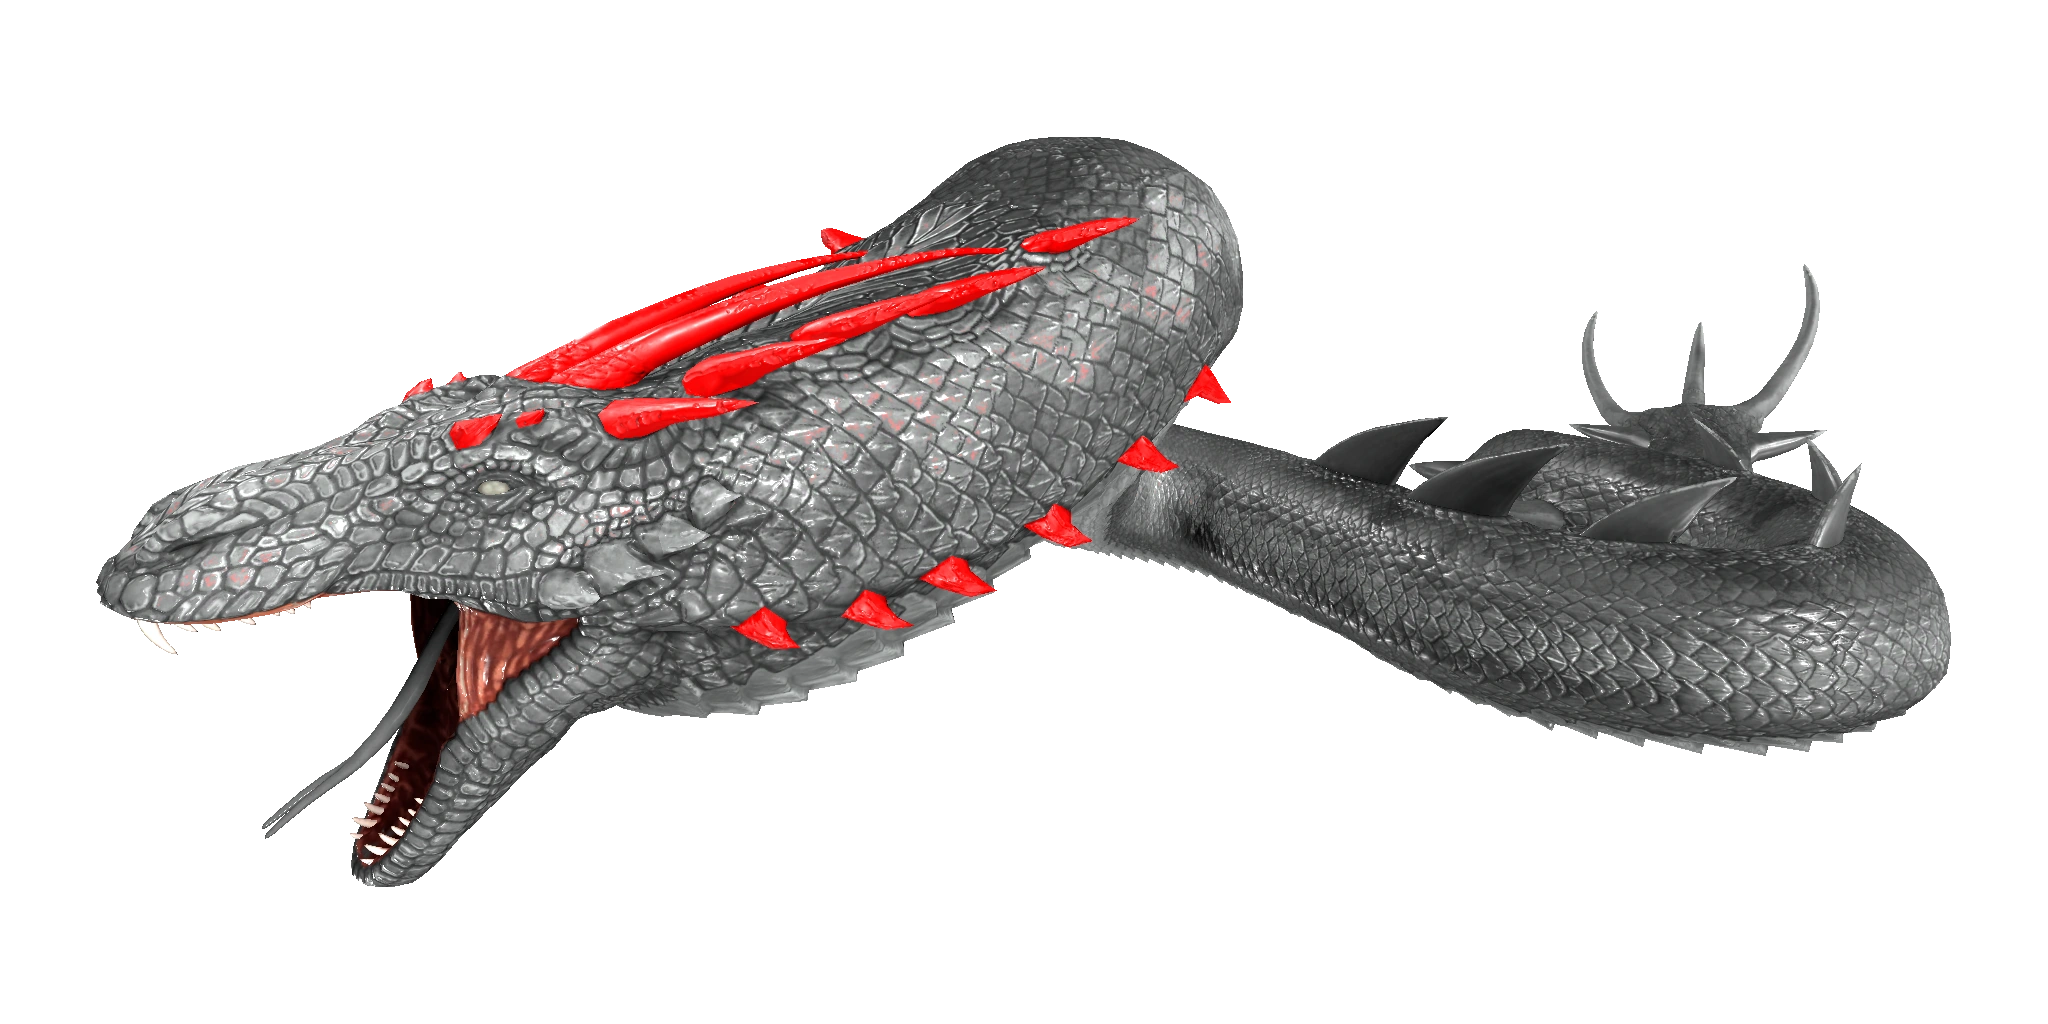
Horns
Underbelly

Region 3 is not used
for this Creature.
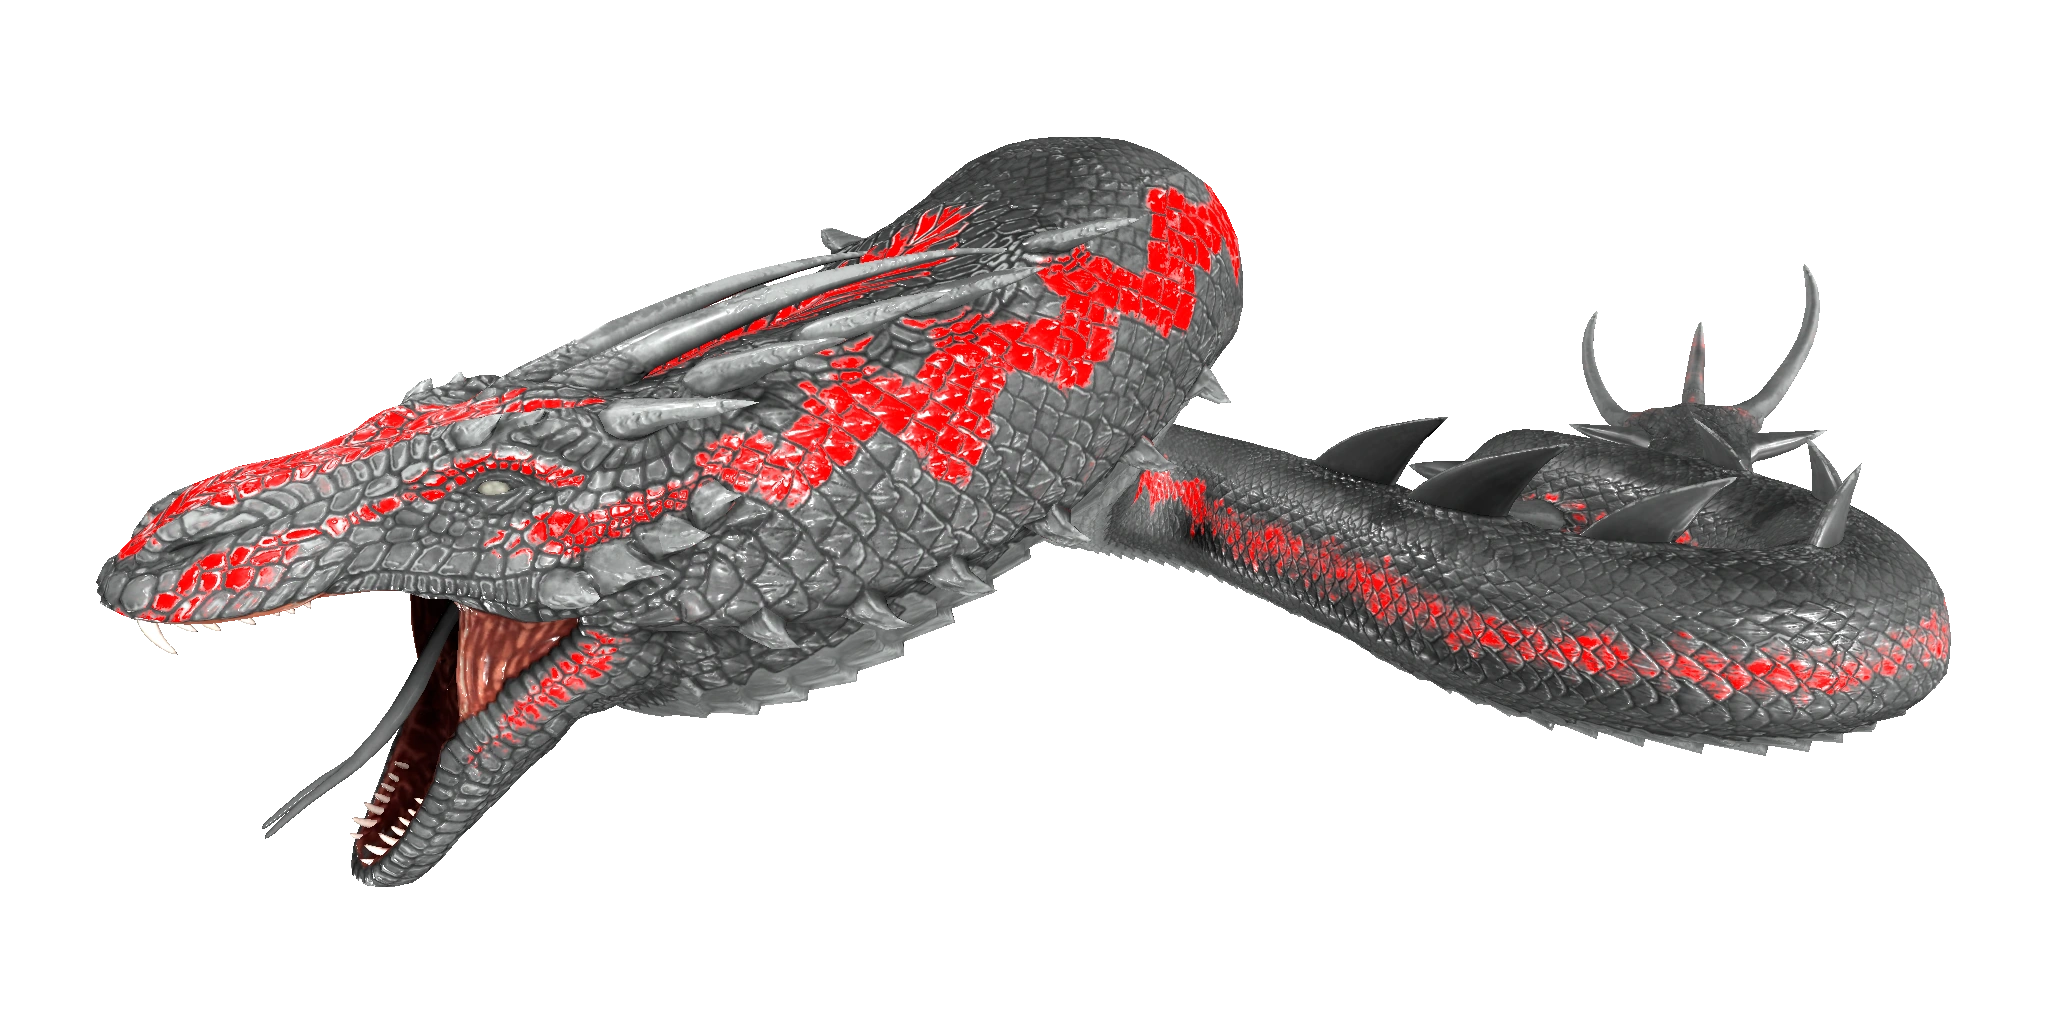
Emissive
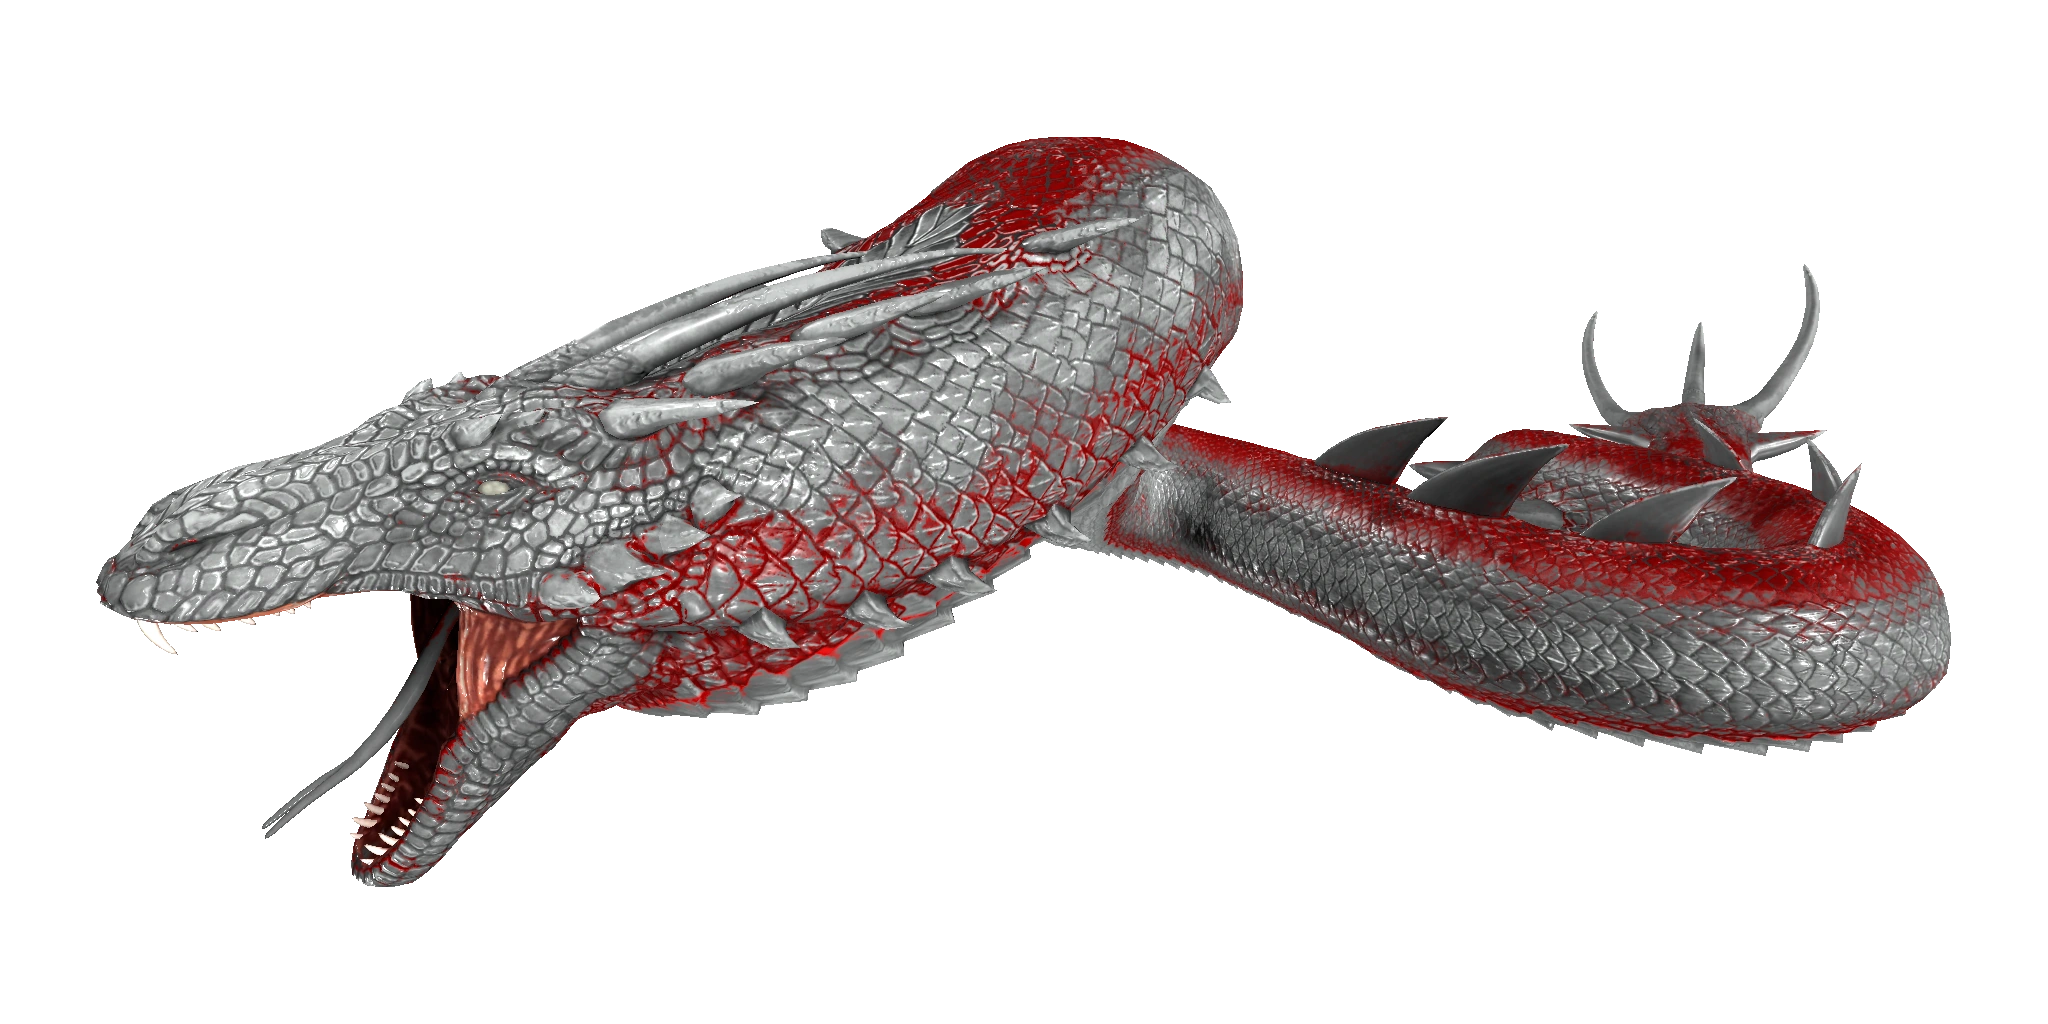
Highlights
Drops
Base Stats and Growth
| Attribute | Base Value | Level Increase | Taming Bonus | ||
|---|---|---|---|---|---|
| Wild | Tamed | Additive | Multiplicative | ||
| 2750 | +550 | +5.4% | 0.07 | (TBHM: 50%) | |
| 650 | +65 | +10% | |||
| N/A | N/A | N/A | |||
| 2500 | +250 | +10% | |||
| 2200 | +44 | +4% | |||
| 55 / 120 | +2.75 / +6 | +1.7% | 7% | 17.6% | |
| 100% | N/A | +1% | 20% | ||
| 175 | +10.5 | N/A | 0.5 | ||
- For a comparison of the stats of all creatures, see Base Creature Statistics.
- For an explanation of exactly how the levelup calculation works, see Creature Stats Calculation.
| Movement [u/s] |
Base Speed | Sprinting Speed | Stamina | ||||
|---|---|---|---|---|---|---|---|
| Wild | Tamed1 | Tamed2 | Wild | Tamed1 | Tamed2 | ||
| Walking | 600 | ? | ? | 1008.0001 | 1680 | 2016 | 6 |
| Swimming | 400 | ? | ? | ? | ? | ? | ? |
- 1These are the base speeds of the creature at 100% Movement Speed.
- 2These are the speeds of the creature tamed and non-imprinted.
- For a comparison of the speeds of all creatures, see Base Creature Speeds.
| Melee | Stamina Cost | Attack Range | Description | ||||||||||
|---|---|---|---|---|---|---|---|---|---|---|---|---|---|
| Base | Minimum | Activation | |||||||||||
| 10 | 1300 | 0 | 1500 | ||||||||||
| Attack Type | Damage | Projectile Values | Torpor Values | Status Effect: Stamina | Status Effect: Torpidity | ||||||||
| Life | Impulse | Radius | Base | Mult | Duration | Damage Mult | Amount | Duration | Damage Mult | Amount | |||
| Melee | 55 | 10 | 3 | 165 | |||||||||
| Ranged | Stamina Cost | Attack Range | Description | ||||||||||
|---|---|---|---|---|---|---|---|---|---|---|---|---|---|
| Base | Minimum | Activation | |||||||||||
| 65 | 5000 | 1000 | 0 | ||||||||||
| Attack Type | Damage | Projectile Values | Torpor Values | Status Effect: Stamina | Status Effect: Torpidity | ||||||||
| Life | Impulse | Radius | Base | Mult | Duration | Damage Mult | Amount | Duration | Damage Mult | Amount | |||
| Melee | 55 | 10 | 3 | 165 | |||||||||
| Projectile | Impact | 120 | 5 | ||||||||||
| Explosion | 60 | 5 | 500 | ||||||||||
| Gaze | Stamina Cost | Attack Range | Description | ||||||||||
|---|---|---|---|---|---|---|---|---|---|---|---|---|---|
| Base | Minimum | Activation | |||||||||||
| 50 | 5000 | 0 | 0 | ||||||||||
| Roar | Stamina Cost | Attack Range | Description | ||||||||||
|---|---|---|---|---|---|---|---|---|---|---|---|---|---|
| Base | Minimum | Activation | |||||||||||
| 0 | 5000 | 0 | 0 | ||||||||||
Wild Stats Level-up
Type in values of a wild creature to see on which stats it's emphasized. Green values on a high-level creature are very good for breeding. If you have already tamed your creature you can try to recover the breeding stats with an external tool.[1]
The stat-calculator does not work in the mobile-view, see here for alternatives: Apps
Note that after the creature is tamed it gets bonuses on some stats depending on the taming effectiveness. This makes it hard to retrieve the levels on a tamed creature, so this tool is only for wild ones, but gives a first impression, how well the stats are distributed.
Combat
This section describes how to fight against the Basilisk.
General
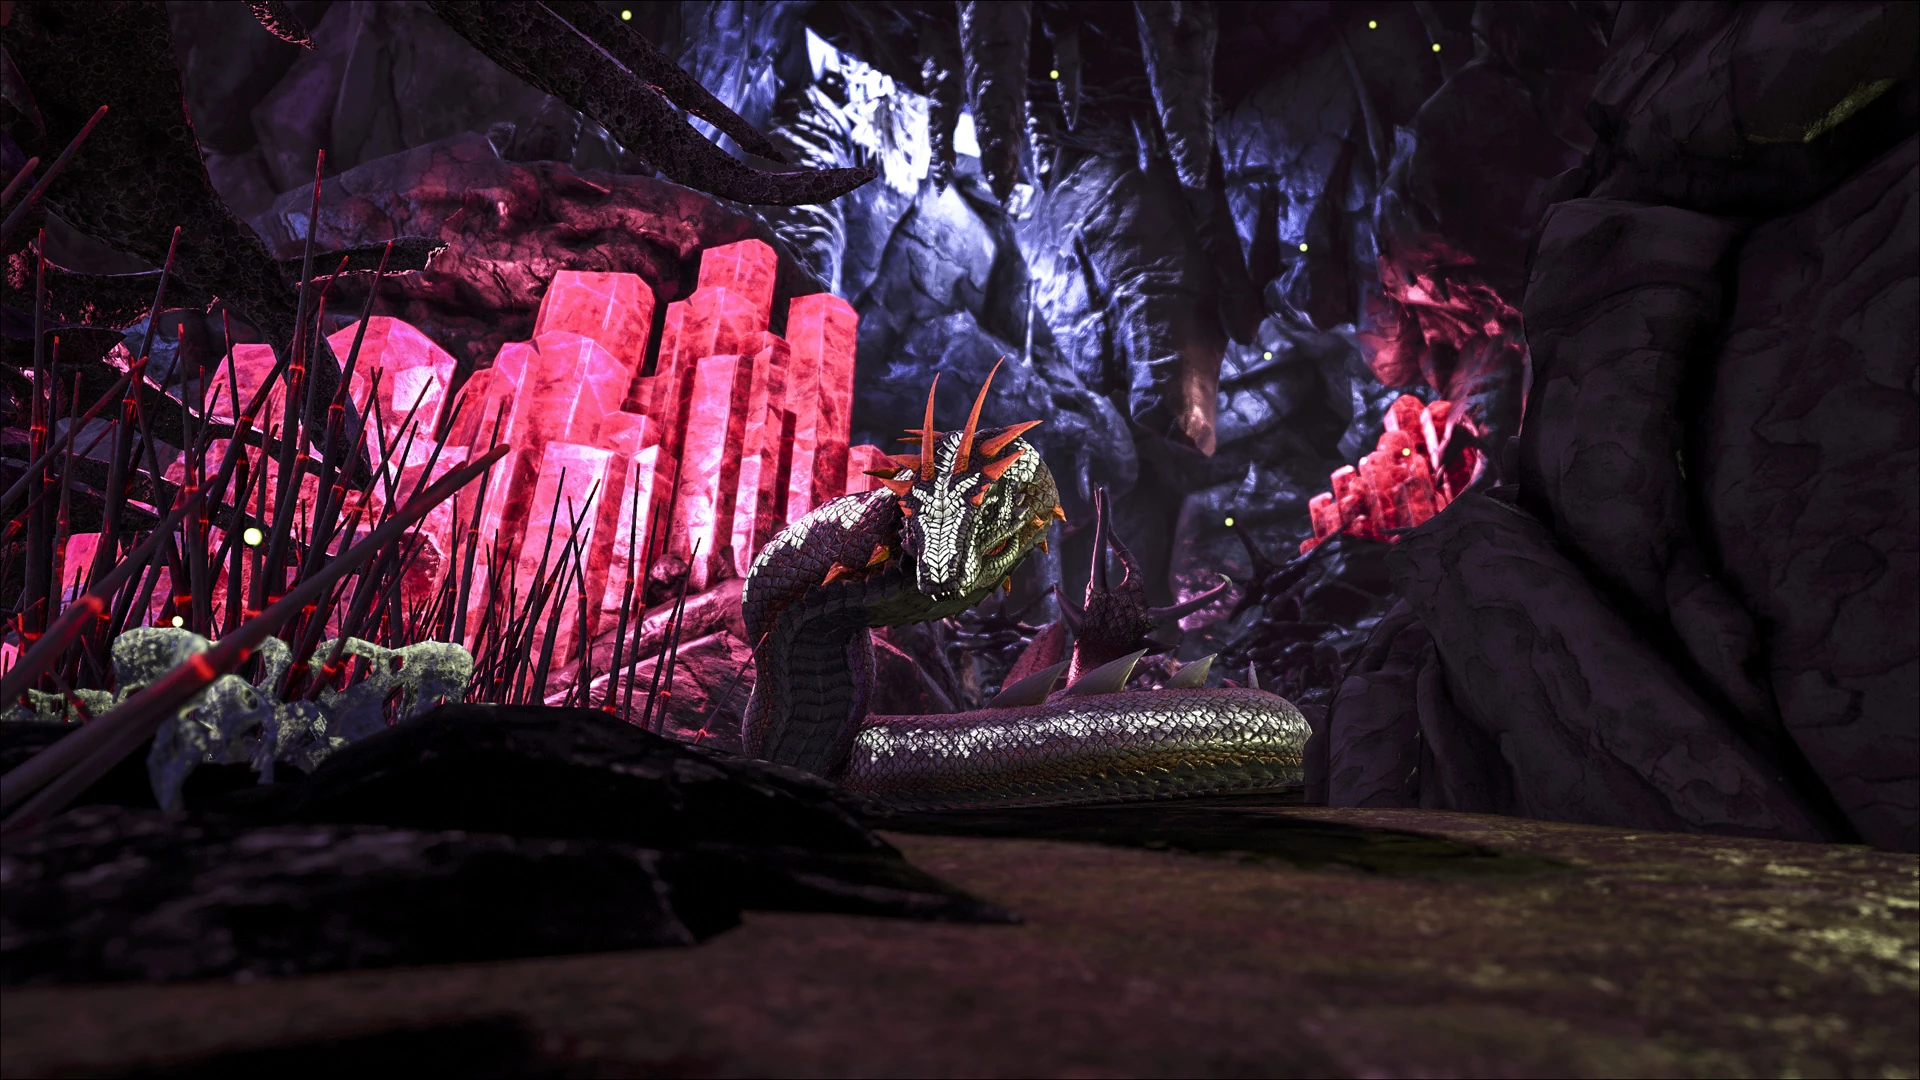
Basilisk always stays hidden throughout its existence through burrowing. It is possible to tell if one is near when there is a forked tail sticking out of the rubble. Approaching more than a few dozen feet is more than enough to aggravate the creature, causing it to emerge.
Strategy
Easy to outrun when mounted. If it is in the way you can kite over a cliff. They will follow you over and then be out of your way.
For killing its not much harder to kill than a Spino.. Avoid close range fighting without a ![]() Gas Mask! Much like
Gas Mask! Much like ![]() Poison Wyverns, the poison can be negated with a
Poison Wyverns, the poison can be negated with a ![]() Gas Mask or
Hazard Suit.
Gas Mask or
Hazard Suit.
Weaponry
Utilize ranged weapons such as Assault Rifle to deal with Basilisk. Low levels can be killed with a crossbow if you're able to shoot from a safe location; it will require a lot of arrows. Because it can't be knocked down, it is highly discouraged to utilize Torpor-inducing ammo and weapon. As its melee attack induces Torpor, refrain from using melee weapons, for it can knock out faster than it can deal damage.
Dangers
The Basilisk has a poison attack that explodes on impact. Dealing massive damage, much like the ![]() Poison Wyvern a
Poison Wyvern a ![]() Gas Mask can negate this.
Gas Mask can negate this.
Weakness
- Extremely slow to turn and has a very wide turning circle.
- Very slow in the water.
- Due to the long body, it takes a second or two to get completely out of water. This allows dangerous fish more time to attack.
- Despite being a strong creature, Basilisks take above average damage from falls of any height.
Taming
The Basilisk is tamed non-violently, rather than through the use of tranquilizers.
To tame one, the player must drop a fertilized Rock Drake egg on the ground and/or near the Basilisk while it is not burrowed (while it will still eat egg even when aggro'd, chances of it eating are very low even when brought close in its path, and it is best to kite it close and make it lose interest in the player). The Basilisk will "attack" the egg when it is nearby one of them and eat it, gaining taming progress. The ancestry (e.g. the levels of the parents) of each fertilized egg will not affect the taming speed.
If more eggs are required, retreat to a safe location for a long duration, as the rate at which the Basilisk returns to being feedable is very low.
As flying mounts are not available in the map it exists in, one of such strategy is to utilize ![]() Raptor with High movement speed and lure it over to the fertilized egg as it moves relatively quick once aggravated. If dropping while running, ensure the egg are dropped from your own inventory, for when you drop the egg from the mount's inventory, the Basilisk will still eat the egg when it is not aggravated, but no taming progress will be made.
Raptor with High movement speed and lure it over to the fertilized egg as it moves relatively quick once aggravated. If dropping while running, ensure the egg are dropped from your own inventory, for when you drop the egg from the mount's inventory, the Basilisk will still eat the egg when it is not aggravated, but no taming progress will be made.
Another method would be to utilize mounts the Basilisk are not aggravated by, such as ![]() Rock Drake. Dismount nearby and mount after getting its attention, then kite it into a circle. Do not hit it. Pay close attention to it-the moment it turns its head away from the drake, dismount to the other side and remount to hold aggro.
Rock Drake. Dismount nearby and mount after getting its attention, then kite it into a circle. Do not hit it. Pay close attention to it-the moment it turns its head away from the drake, dismount to the other side and remount to hold aggro.
One can also use a Karkinos. Hold a passive wild dino, such as a parasaur, and aggro the Basilisk. Keep turning in a circle to keep the parasaur safe, and drop the eggs.
Using structure involves using dinosaur gates and/or walls with fence foundation while leaving a corner gap small enough for the player to escape, but Basilisk not to escape. However, it will try to attack the structure just to get towards the character, so moving around to get its attention of your location and losing it after is required for this strategy to work. Be mindful for its poison spit however.
By far the easiest way to tame a Basilisk is creating a taming pen with pillars and foundations. The basilisk can't burrow through foundations so you will never lose taming effectiveness.
The Basilisk loses about 7-8% taming effectiveness every time it burrows. (Needs further testing)
Preferred Food
| Feeding Interval | Time | ||
|---|---|---|---|
| 8 | 10:00 | 1:10:01 | |
| 8 | 10:00 | 1:10:01 | |
| 8 | 10:00 | 1:10:01 | |
| 8 | 10:00 | 1:10:01 | |
| Feeding Interval | Time | ||
|---|---|---|---|
| 10 | 09:43 | 1:27:31 | |
| 10 | 09:43 | 1:27:31 | |
| 10 | 09:43 | 1:27:31 | |
| 10 | 09:43 | 1:27:31 | |
| Feeding Interval | Time | ||
|---|---|---|---|
| 13 | 09:28 | 1:53:46 | |
| 13 | 09:28 | 1:53:46 | |
| 13 | 09:28 | 1:53:46 | |
| 13 | 09:28 | 1:53:46 | |
| Feeding Interval | Time | ||
|---|---|---|---|
| 16 | 09:20 | 2:20:01 | |
| 16 | 09:20 | 2:20:01 | |
| 16 | 09:20 | 2:20:01 | |
| 16 | 09:20 | 2:20:01 | |
| Feeding Interval | Time | ||
|---|---|---|---|
| 18 | 09:15 | 2:37:31 | |
| 18 | 09:15 | 2:37:31 | |
| 18 | 09:15 | 2:37:31 | |
| 18 | 09:15 | 2:37:31 | |
| Feeding Interval | Time | ||
|---|---|---|---|
| 21 | 09:11 | 3:03:46 | |
| 21 | 09:11 | 3:03:46 | |
| 21 | 09:11 | 3:03:46 | |
| 21 | 09:11 | 3:03:46 | |
Note that the values are for optimal cases, always bring extra supplies!
For a level-dependent count of resources needed, try an external taming calculator.
Once tamed, the Basilisk will consume a standard carnivore diet, as well as both fertilized and unfertilized eggs.
Utility
Roles
- Jack-of-all-trades Mount:The Basilisk has incredibly high weight, and is faster than all but a few animals, and it is the strongest animal on Aberration short of a Reaper, so it can be used as a travel mount, a heavy items transport, and a battle mount all at once, while meeting or exceeding the creatures generally used for just an any one of those tasks. It even lacks an oxygen stat, allowing it to remain underwater indefinitely. It is not without downsides however; despite lacking an oxygen stat, it moves and turns very slowly in the water, making it a poor choice for water combat (though a decent one for carrying the fruits of underwater gathering, provided it has an escort.) The saddle is unlocked at a fairly high level. It does not actually climb walls; although it can scale smaller lumps and rocks, it can only reach a certain height, and it is vulnerable to fall damage.
- Dino Tamer: The Basilisk's primary attack inflicts torpor equal to 3x the damage dealt applied over a period of 10 seconds, similar to the
 Pulmonoscorpius. This effect does not stack, so to inflict maximum torpor and minimum damage, space your attacks at least 10 seconds apart.
 - Long Distance Transport: The Basilisk has the highest base carrying capacity of all non- Titanosaur creatures. While the Basilisks speed is on par with the Giganotosaurus the Basilisks carrying capacity is more than 3x the Giga's making it the best in long distance transport.
- Nameless Hunter: The Basilisk, while its wide turn radius can present a problem when being swarmed by Nameless from all sides, has a heavy advantage in its favor when killing these vermin: its poison breath. The Basilisk's poisonous spit is the only attack that can hit directly through Nameless armor, even without chargelight weakening them; whole packs can be taken out in a single blast, depending on the snake's damage stats. This makes Basilisks extremely effective in harvesting Nameless Venom.
Collectibles
| Resource | Efficiency |
|---|---|
| ? |
Notes/Trivia
For information pertaining specifically to the real-world Basilisk, see the relevant Wikipedia article.
- The torn dossier of the Basilisk was first introduced on November 26, 2017.[2]
- Basilisk shares the same egg-eating taming method as that of Titanoboa. Unlike Titanoboa however, it also takes in meat as food supply after taming.
- It is harder to tame Basilisk because, unlike Titanoboa, it burrows itself into the earth when it is not focused on something. They will not eat any nearby Drake Eggs while burrowed.
- The Basilisk closely resembles a Wyvern with its dragon like skull and spikes along its body and tail than it does a snake.
- Although Basilisk is huge, small carnivores like Raptor will still be aggressive to a tamed Basilisk.
- On the opposite side however, wild Basilisk ignores large mounts like the Karkinos and Rock Drake, unless the survivor had already provoked it in the first place.
- On the opposite side however, wild Basilisk ignores large mounts like the
- The scientific name means "Serpent Prince".
- The Basilisk itself is not immune to radiation. Burying will not stop it from taking damage if it has already been affected by radiation.
- Domesticated Basilisks, much like Poison Wyvern, can damage their rider if using their poison attack at close range.
- If your Basilisk's poison breath kills a dinosaur after you dismount, the system will state that the dinosaur was killed by you, and not your mount.
- Like Rex and Spinosaurus, Basilisk deal trample damage to smaller creatures.
- The Basilisk has one of the largest turning radii in the entire game, so it is highly recommended to have a saddle ready when you tame it, or you risk the chance of it falling off cliffs.
- Can be scared by Yutyrannus.
- Gets a 75% weight reduction on carried Stone, same as a Doedicurus.
- Even when the player sets their own resistance to 0 (meaning they take no damage) the Basilisk can still kill the player with it's poisonous spit. It is assumed this is because resistance may just be raising the players armor and the poison spit ignores armor completely.
Gallery
Torn dossier