| This article is a stub. You can help the ARK: Survival Evolved Wiki by expanding it. |
"As a man or woman stranded naked, freezing and starving on the shores of a mysterious island called ARK, you must hunt, harvest resources, craft items, grow crops, research technologies, and build shelters to withstand the elements. Use your cunning and resources to kill or tame the leviathan dinosaurs and other primeval creatures roaming the land, and team up with or prey on hundreds of other players to survive, dominate... and escape!"
Here's a link to the Steam store page, so you can get started on your journey through the ARK.
You start your journey with nothing but your fists and your wits to survive the creatures hunting you. The following is some fundamental information to help you get started:
For more advance tips, advices and tricks, see Tips and Tricks
Starting The Game
After the WildCard logo is shown and you see the Title Screen press any button and you will have the options on the left to 'Host a Server' or 'Join a Server'. Host a Server is actually where the Single-Player gameplay is. Let's assume Single-Player is where you will start your adventure; therefore you went to 'Host a Server'. You will have the settings for your gameplay on the left of the screen and the available maps in the center of the screen. Select the map you can play on and hit the Single Player Option beneath the map column to start your survival.
Character Creation
Choosing to create a new character will delete any existing character you have on the same server, removing you from any tribes and losing ownership of all property so be careful when using this option!
When you begin in ARK, you must create a Survivor. Character creation is mostly cosmetic and does not affect the character's hitbox. However, size and skin color can benefit the player's playstyle to some extent:
- Playing a short survivor can make it easier to hide in bushes or behind rocks from other players.
- A survivor with darker skin could blend in the shadows to camouflage themselves and hide from
 other survivors.
On the other hand, if you are too tall your head will stick out above bushes and various structures exposing you. For an average height character (that fits comfortably through door-frames), it's optimal to decrease 'from the default' the: Legs, Arms, and Torso all by 2 or 3 points.
"If you have the ability to use admin commands checkout Body Regions for other ways of customizing characters."
Once you are done customizing your character's appearance, you may name your Survivor which will appear to other players that approach you in-game or game chat. On ARK: Survival Evolved Mobile you might want to consider letting the name of your character end on certain letters in order to be able to tame a ![]() Griffin more easily.
Once you officially created your survivor into the game by means of spawning; you cannot alter the character's body form again.
Griffin more easily.
Once you officially created your survivor into the game by means of spawning; you cannot alter the character's body form again.
Note: the preset options on top of the Character Creation screen is only momentary, once you leave the screen you will not be able to use that save preset again.
Now that you have created your survivor, you are given a set of spawn points on the map to choose from. It is generally regarded that the southern spawn locations are safer, whereas the northern areas tend to have several dangerous creatures roaming near the beaches such as ![]() Raptors,
Raptors, ![]() Direwolves and
Direwolves and ![]() Sabertooths. It is entirely possible to be immediately killed by a wild creature when spawning, in that case, you must simply choose and respawn again!
Sabertooths. It is entirely possible to be immediately killed by a wild creature when spawning, in that case, you must simply choose and respawn again!
Freshly Spawned
Welcome to the wildlife of ARK. If you are lucky, you may not see any large or dangerous dinos like the ![]() Rex or
Rex or ![]() Raptor, but you will find a wide variety of dinos on the beaches. Ignore most of them until you have weapons to defend yourself. Instead hunt oblivious creatures for Meat and Hide.
Raptor, but you will find a wide variety of dinos on the beaches. Ignore most of them until you have weapons to defend yourself. Instead hunt oblivious creatures for Meat and Hide. ![]() Dodos are recommended prey, but if you see
Dodos are recommended prey, but if you see ![]() Trilobites hunt them for their rich resources as well. Few predators spawn on the Southern beach on The Island, but beware of
Trilobites hunt them for their rich resources as well. Few predators spawn on the Southern beach on The Island, but beware of ![]() Dilophosaurus. They can kill a beginner fairly quick, just as well as a pack of voracious
Dilophosaurus. They can kill a beginner fairly quick, just as well as a pack of voracious ![]() Compies can. It's best to avoid all confrontation until you learn the basic survival of the game.
Compies can. It's best to avoid all confrontation until you learn the basic survival of the game.
Once you have spawned, your first priority is to craft a ![]() Stone Pick. To craft a Stone Pick, you'll need:
Stone Pick. To craft a Stone Pick, you'll need:
You should be able to find plenty of Stone laying around on the beaches.
- (Some stones are part of the ground texture. Don’t be fooled! You can pick up any small stone with a shadow). Look on the ground for
 Grey Stones, and tap the E if on PC, or on Xbox, and if on the PS4 when you're above them to pick them up.
To get Wood and Thatch, go to a tree and punch it repeatedly. Punching trees with your fists will cause you to lose ![]() Health by injury, so you'll only want to punch it enough to gather your (1) Wood and (10) Thatch.
Health by injury, so you'll only want to punch it enough to gather your (1) Wood and (10) Thatch.
Inventory/Crafting
Many items are held in stacks of one hundred while others like armor and tools are not stacked. Creatures and storage units can also hold items in its inventory.
- You can access your Crafting Menu (pc shortcut VKey) through your inventory by pressing the key then the on PS4, or key then the on Xbox. This will show you all the Blueprints called Engrams that you have learned and what materials are required to make each item.
Once you've gathered enough materials to craft your first Stone Pick return to the Crafting Menu and select the Stone Pick Engram and craft it by either double-tap the Interact/Confirm button ![]() , or
, or ![]() to make (1) PickAxe.
to make (1) PickAxe.
Hotbar
The Hotbar is where you place shortcut items from your inventory to the bar at the bottom of the screen. In survival it's important to be able to quickly choose the right tool or item when it's necessary. Setting up the hot bar is crucial for your beginning journey.
- It's wise to have your important tools and weapons like the Hatchet or the Spear in the hotbar.
- Most survivors eat their food from their inventory, however it helps to place the food and a water container such as a Waterskin in the hotbar when traversing in a cold or dangerous environment.
- For building, it's a lot easier to have the structures you chosen temporarily in the hotbar as well. Be sure to remove them when you are not building so the assign structures on the hotbar doesn't accidentally get pressed while you're under attack.
Return to your inventory and then place your new tool in your Hotbar at the bottom of the screen by selecting it with the Confirm Button and then selecting the Hotbar Slot of your choice. This makes it where you can press the buttons that is assigned to the Hotbar slots to have quick access to the tools or items you placed.
Hotkeys (PC)
For learning the Buttons on other Gaming Consoles visit: Controls
| Action | Default Key | Result |
|---|---|---|
| Drop Item | O | Item is dropped from the inventory currently being accessed to the ground. |
| Transfer Stack | T | The stack you hover over is transferred from one inventory currently being accessed to the other. |
| Transfer Half-Stack | ⇧ Shift+T | Half of the stack you hover over is transferred from one inventory currently being accessed to the other. |
| Transfer Item | Ctrl+T | One item from the stack you hover over is transferred from one inventory currently being accessed to the other. |
| Transfer Item | Lmbx2 | One item from the stack you double click is transferred from one inventory currently being accessed to the other. |
| Transfer Five Items | ⇧ Shift+Lmbx2 | Five items from the stack you double click are transferred from one inventory currently being accessed to the other. |
| Transfer Half-Stack | Ctrl+Lmbx2 | Half of the stack you double click is transferred from one inventory currently being accessed to the other. |
| Toggle Item Names | Q | Toggle whether or not to show the names of all inventory items over the item icon. |
| Toggle Tooltip | G | Toggle display of tooltip information when hovering over inventory icons. |
Your First Level Up

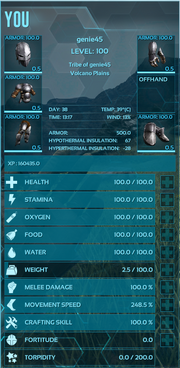
ingame stats screen
By the time you've created your first stone pick, you've probably received a message that you have leveled up, since it only requires 5 experience to level up the first time. You may have missed it, though. You will see the message if you open your inventory. Leveling up is an essential part of surviving. You will be able to improve your character's statistics as well as Engrams Points for learning crafting recipes.
Once you're in your inventory, you can press the [+] button next to one of your stats to increase the property of that statistic. See Attributes for more information on stats.
Crafting the Essentials
Your beginning or new survivor will already know (3) Engrams: ![]() Note,
Note, ![]() Stone Pick and
Stone Pick and ![]() Torch. Engrams are the crafting knowledge your character has learned by distributing experience to survival traits in form of Engram Points by Leveling in the Center Inventory Menu. After harvesting Berries for food and finding
Torch. Engrams are the crafting knowledge your character has learned by distributing experience to survival traits in form of Engram Points by Leveling in the Center Inventory Menu. After harvesting Berries for food and finding ![]() Fiber from the bushes and foliage. You can find all the materials needed almost anywhere for the basic essentials.
Fiber from the bushes and foliage. You can find all the materials needed almost anywhere for the basic essentials.
After you've increased one of your stats. The Engram menu will appear for you to spend engram points for unlocking new Engrams. Being early in the game, it's recommended that you invest the Engram Points wisely. From the previous sections your survivor learned to craft the ![]() Stone Pick. The next thing is to learn to craft
Stone Pick. The next thing is to learn to craft ![]() Cloth Armor with
Cloth Armor with ![]() Fiber in order to give your Survivor some protection from the Environment. For extreme heat or cold will harm your survivor.
Fiber in order to give your Survivor some protection from the Environment. For extreme heat or cold will harm your survivor.
If you haven't already, invest the remaining Engram Points to learn how to craft your new best friend; the ![]() Hatchet. With the capability to gather large quantities of
Hatchet. With the capability to gather large quantities of ![]() Wood faster, build
Wood faster, build ![]() Campfires to
Campfires to ![]() cook meat and to stay warm. Gather
cook meat and to stay warm. Gather ![]() Hide with the Hatchet from dinos to craft a more tough and warmer clothing called:
Hide with the Hatchet from dinos to craft a more tough and warmer clothing called: ![]() Hide Armor.
Hide Armor.
For more information regarding clothing and armor see:Armor
From your crafting and harvesting experiences you probably gained another level. Use what you've learned to craft ![]() Spears and eventually
Spears and eventually ![]() Bolas. Bolas are useful for capturing or stopping prey or predators that has small legs comparably for example:
Bolas. Bolas are useful for capturing or stopping prey or predators that has small legs comparably for example:
Has small legs. Whereas the:
has large thick legs and cannot be caught by a normal Bola.
| “ | A fun fact, even elite players with advanced weaponry still use spears. To conserve resources that maintain their technology. | „ |
Tools of Survival
To make gathering resources easier, its important to know what's the right tool for the job:
- Rocks: Pick harvest more Flint and Metal while Hatchet yield more Stone.
- Trees, stumps, etc.: Pick yield the most Thatch while Hatchet yield more Wood.
- Corpses: Picks result in more Meat and Hatchets obtain more Hide, Chitin and Keratin (use a Wooden Club to harvest more Organic Polymer from Kairuku).
- Rocks:
With these basic tools, you can start properly harvesting larger amounts of resources and creating all the essential tools you need for survival.
The stone pick is abysmal for harvesting metal( or any rare resource); craft a metal pick after learning the refining forge, smithy, and the metal tool engrams. The same goes for the stone/metal hatchet.
Now that you are equipped with the essentials and basic knowledge of survival, go forth and build a ![]() Shelter or Base.
Shelter or Base.
Building for Beginners
A place where a Survivor can escape the dangers of harsh weather to being hunted by dinosaurs or players. A place to hide one's valuables, or simply a place to call 'Home'. Stories are seldom heard of survivors surviving without shelter. While the structure design of the Base/Shelter depends on the builder themselves, the game engine basically considers a shelter to have walls surrounding the players with a roof.[1] Some natural boundaries count as walls and/or a roof, allowing the player to gain the shelter buff without building fully surounding walls/ceilings. As long as the ![]() Shelter symbol shows on the right of the screen, the game counts it as a Shelter.
Shelter symbol shows on the right of the screen, the game counts it as a Shelter.
- A very basic box shelter has:
- (1) Thatch Foundation
- (3) Thatch Walls
- (1) Thatch Doorframe + Thatch Door
- (1) Thatch Ceiling
- (1)
White/green beacons sometimes contain a full shelter of Thatch or Wood, respectively.
It is possible to build a shelter without a floor foundation and instead use a combination of ![]() Pillars with ceilings connected above the pillars. You must have a foundation placed down to build on, then have walls and ceilings all connected to form the
Pillars with ceilings connected above the pillars. You must have a foundation placed down to build on, then have walls and ceilings all connected to form the ![]() Shelter symbol.
Shelter symbol. ![]() Floor Foundations and
Floor Foundations and ![]() Ceilings both can be counted as floors.
Ceilings both can be counted as floors.
Natural Shelters
There are natural shelters that are located in various rock formations. For example, in Scorched Earth![]() 's desert the player could crawl under certain large rocks and will see the shelter symbol. And in The Center
's desert the player could crawl under certain large rocks and will see the shelter symbol. And in The Center ![]() and Ragnarok
and Ragnarok ![]() there are rock formations and caves that counts as shelters as well.
there are rock formations and caves that counts as shelters as well.
Hunger and Hydration
Hunger
Staying satiated is necessary to survive on the ARK. Gathered berries can be eaten, and hunting can be quite satisfying. Simply put the desired food in your hotbar, press the corresponding button, and you can eat anything you deem fit (including some ![]() not so gracious choices.) So be careful what consumable you place in the Hotbar, accidents are prone to happen.
not so gracious choices.) So be careful what consumable you place in the Hotbar, accidents are prone to happen.
- Your hunger meter fills as you eat, and depletes as you exert yourself. Survival is key, starvation is death.
- Hunger will increase more quickly when you regenerate stamina. And the Cold makes you starve faster.
Hydration
Staying hydrated is essential to your survival on the ARK. To do this simply walk into a shallow portion of water, look down and press the E on PC, the ![]() on Xbox, and the
on Xbox, and the ![]() on PS4 to drink! You can also submerge yourself in a body of water, though depending on the location you run the risk of attracting predators if by a swamp or river:
on PS4 to drink! You can also submerge yourself in a body of water, though depending on the location you run the risk of attracting predators if by a swamp or river:
The ocean:
If you wish to fill ![]() a water container of some sort, move towards a body of water or in the rain, place the bottle in your hotbar and then press the corresponding hotbar buttons to the water container and it will fill with delicious ark water (press the same key to drink the water when filled).
a water container of some sort, move towards a body of water or in the rain, place the bottle in your hotbar and then press the corresponding hotbar buttons to the water container and it will fill with delicious ark water (press the same key to drink the water when filled).
- Your hydration meter will fill up and stay full when it's raining.
- Thirst steadily decreases with time but will decrease more quickly when you regenerate stamina.
- The "Hot" status effect increases water consumption.
Finding Food
For other kinds of food and cooking recipes, see Cooking. For learning how to grow your own food see Farming.
Berries
- Berries are a good source of food and picking them as you walk is a good way to stock up. But be careful of eating these two berries:
- Narcoberry
- in quantities above 5 or 6 will put you to sleep without points in Fortitude.
- Stimberry
- will rapidly make you thirsty, but will counteract the drowsiness/ Torpidity that is inflicted by certain poisons/attacks; such as that of the Scorpion ( Pulmonoscorpius), Narcoberry, Titanoboa, or the infamous Troodon; where falling asleep means almost certain death.
- will rapidly make you thirsty, but will counteract the drowsiness/
Hunting
While hunting gives good experience, hide, and meat among other resources. Exercise caution when hunting anything other than ![]() Coel or
Coel or ![]() Dodo early in the game, as dinosaurs are much more powerful than humans without technology. The spear attack causes knockback to the attacked creature and is essential to early game survival.
Dodo early in the game, as dinosaurs are much more powerful than humans without technology. The spear attack causes knockback to the attacked creature and is essential to early game survival.
| “ | Remember even |
„ |
- Spear Fishing is sometimes a quick but easy way to get raw meat. Just keep an eye out for the deadly water predators such as the:
,and the ![]() Sabertooth Salmon (when hit will attack you in packs)
Sabertooth Salmon (when hit will attack you in packs)
- You can also eat Raw Meat at the cost of a few HP and smaller amount of food recovered than Cooked Meat. It's a quick solution to hunger but generally not recommended.
- Use Campfires to cook Raw Meat and Raw Fish Meat. Cooked Meat always tastes better than raw, but more importantly it helps restore your Health and satisfies your Hunger.
Obelisks and Supply Crates
If you peer out into the distance, there are enormous floating structures casting an otherworldly light.
They are called
![]() Obelisks. Beneath the Obelisk, is a strange protruding piece of metal with a button attached on top, called a 'terminal'. The terminal grants access to the Obelisk. Whenever an individual present their trophies as tribute under a Obelisk a portal will open for a limited amount of time. Beyond the portals is where the
Obelisks. Beneath the Obelisk, is a strange protruding piece of metal with a button attached on top, called a 'terminal'. The terminal grants access to the Obelisk. Whenever an individual present their trophies as tribute under a Obelisk a portal will open for a limited amount of time. Beyond the portals is where the ![]() Guardians awaits their challengers. As long as the portal is inactive, it's moderately safe to explore the area. However, if your curiosity finds itself before the terminal you may be transported to an alternate world.
Guardians awaits their challengers. As long as the portal is inactive, it's moderately safe to explore the area. However, if your curiosity finds itself before the terminal you may be transported to an alternate world.
Supply Crates
Pay attention to the strange pillars of light with a fairly large mechanical object slowly descending from the sky. Those are called ![]() Supply Crates, and have a variety of supplies within. But do not be fooled, keep in mind that the distance is probably further than you had visioned and the Supply Crates don't last forever. If one appears near you, it might be a good idea to check it out, but notice the color:
Supply Crates, and have a variety of supplies within. But do not be fooled, keep in mind that the distance is probably further than you had visioned and the Supply Crates don't last forever. If one appears near you, it might be a good idea to check it out, but notice the color:
Each color resembles the level granted access.
- White/Prismatic Supply Crates require you to be level 3 to open them.
- Green Supply Crates require you to be level 15 to open them.
- Blue Supply Crates require you to be level 25 to open them.
- Purple Supply Crates require you to be level 35 to open them.
- Yellow Supply Crates require you to be level 45 to open them.
- Red Supply Crates require you to be level 60 to open them.
Servers
The other worlds mentioned in the Obelisk section, is about joining different servers that may or may not be using the same Ark maps. There are 4 different types of servers listed as the following:
- Official
- Unofficial
- Dedicated
- Non-dedicated
Each one can be accessed or searched. Unless, a privately hosted server is set to 'private'.
Information on setting up a PC dedicated server: see Dedicated Server Setup
Official/Unofficial
Official servers are the main online servers run by the developers, WildCard.
Unofficial is referred to privately Rented/Owned Servers.
Dedicated/Non-dedicated
Dedicated Servers, are servers that are hosted by a user. The user cannot interact and if they switch the server to Singleplayer mode it will wipe or delete everything owned by other players.
Non-dedicated servers are local servers hosted from Singleplayer mode. The host can interact however their server is limited to (8) players and the players are tethered to the host meaning they cannot travel a predetermined distance from the host.
Preparing for Specific Situations
Combat
- Once you have the Spear engram, craft a couple of spears and fight some Dilos, as they will give you some combat experience. You will have to learn to dodge (circle-strafing works well) as they have a poison spitting attack that blinds you and severely slows your movement speed.
- Using the landscape to your benefit is an extremely important aspect when fighting dinos as it can give you the edge both in fighting as in taming.
- Basic weapon handling is very important as you will notice that the Stone Axe and the stabbing attack of the spear have different ranges, the more distance you keep with the dino you are fighting the safer you are.
- Always keep an eye on your stamina and health bars, as you won't be able to run when stamina is depleted and when your health is quite low you will be injured and move slowly. If this happens during a tough fight, your chances of success will be really low. Always equip food and Stimberries in your hotbar, as this is the easiest way to recover health and stamina respectively.
Searching for Dinos to Tame
- Torpor-inducing gear, obviously.
- Consider bringing lots of Armor. You need to be able to take a lot of hits from the potential tame while in the Taming process.
- Taming food. If you know what you're looking for, bring extra of that dino's taming food. If you don't know what to expect, bring Raw Mutton and Crops. If you happen to be traveling on a platform saddle pack perishable items in a Refrigerator or Preserving Bin. If you wish to use less advanced items for feeding your tame you should collect them on the spot with a dino.
- Traps. If you know what to expect, bring several traps for its size. If not, just bring smaller traps if it's just you. Large Bear Traps, Chain Bolas, etc. Won't be useful if you don't also have lots of preparations for a large tame.
- Extra Narcoberries or Narcotics to keep unconscious creatures asleep.
- Additional needed supplies suiting your target tame. For example, if you're going to tame a Rex, bring walls and anything else that will be useful.
- If the Extinction Engrams are accessible, have a few Cryopods on standby if you plan to tame a couple of large Creatures that could cause a problem in moving. Mind the decay timer on it though, however.
Exploring
- Dinos. You never know what valuable materials or dangerous dinos you may come across, so bringing a few decent, possibly expendable dinos to fight and hold more weight is a great idea.
- GPS if possible. If not, then bring a Compass. These are what let you draw your map, and the GPS can help you mark important places on the map.
- Lots of food.
- If possible, bring Armor suiting all environments.
- Taming gear. Though not always useful when exploring, as taming takes you off track and slows you, taming gear is something to consider.
- Any extra available gear that you know will be useful in your situation.
Raiding
If you play on any multiplayer PvP server, raids are a major component of the gameplay. The chances of surviving any raid is pretty low. So try to balance good gear and minimum valuables. The Inventory that players take with them on raids varies immensely, so this section will combine different role's preferences and general tips. Note: this section WILL NOT discuss raiding strategies.
- Decent armor. Flak is preferable, as it provides decent protection, but can be expensive to make several sets. Chitin is the next best thing, providing moderate protection and being fairly cheap.
- Weapons that suit your role. Guns, Bows, Pikes, Swords, Explosives, Assault Rifles, Fabricated Sniper Rifles, and even Rocket Launchers are all commonly used.
- Bolas. Any player hit with a Bola is doomed.
- Food/Water. This includes any available dishes made from Rockwell Recipes.
- Resources for repairing Armor and Tools, if they can be repaired from your Inventory.
- Other than the above, bring whatever will help you, depending on your enemy's base, location, and strength. If you're raiding very weak players (Not encouraged, as it is bullying unless they attacked you first) don't risk your good gear. Save it for stronger foes. Minimize items and gear that you will regret losing, and will not be very helpful in the raid. Remove all items from your Inventory that are not required for raids.
Steam Guides
Steam provides an excellent feature for many games, where members of the community can create guides for the public. ARK: Survival Evolved is lucky enough to have a community that is regularly creating more guides and improving the existing ones. A currently popular guide, aimed at beginners is called ARK: A Beginner's Guide and details many areas covered in this wiki and more. Visit the Steam Guides section to find out more.
Updates
Updates or Patch Notes can be found at Patch Notes.
| |||||||||||||||||||||||||||||||||||||||||||||||||||||
- ↑ Citation needed. Game code would be best.